Getting Familiar with Amazon Web Services (Cloud Computing)
Launching, Logging in to, and Stopping an EC2 Instance
Overview
Teaching: 15 min Exercises: 0 minQuestions
How do we start EC2 instances
How do we log on to an EC2 instance
How do we stop an EC2 instance
Objectives
Learn how to launch an EC2 instance and log in to it
Learn how to stop this instance
Launching an EC2 Instance
To launch an EC2 instance, you can click on the blue “Launch Instance” button from the EC2 dashboard. This will bring up the “Step 1: Choose an Amazon Machine Image (AMI)” dashboard as shown below.
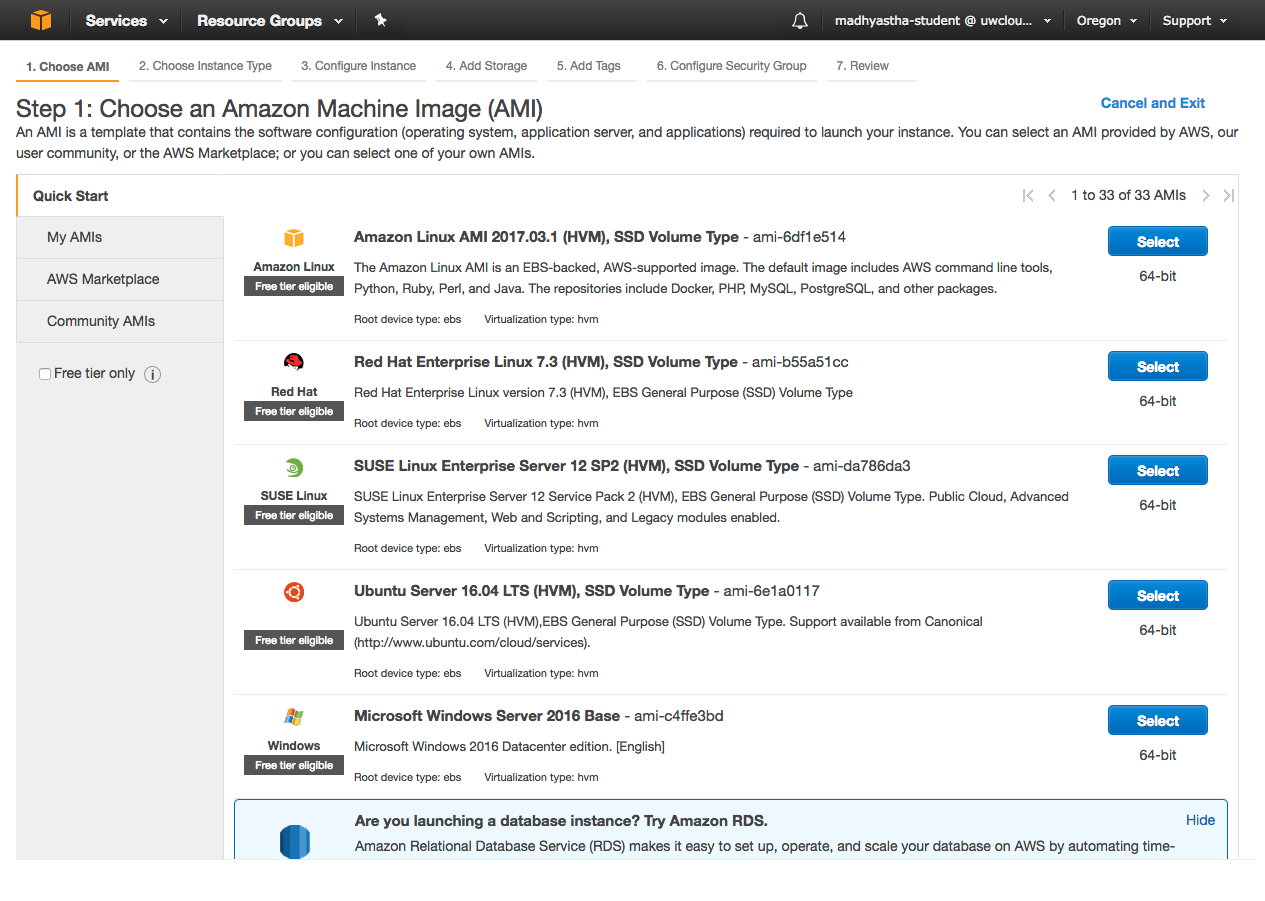
An AMI is a template that describes (probably most importantly) the operating system that you wish to run and the applications that should be installed on your instance. In other words, you can choose an AMI that has all or most of the software that you want to use already installed so that you don’t need to struggle with complex software configurations (unless you want to). Some of these AMIs are available on the AWS Marketplace (see the left menu under Quick Start).
When we begin the class, you will have a lot more options for starting instances from the AWS Marketplace. For example, the NITRC Computational Enviroment includes all of the most popular neuroimaging analysis tools. There is also a version of the NITRC computational neuroimaging environment specifically for processing the Human Connectome Project Computational Environment.
However, even in the Quick Start menu shown above, you have many options. Note those that are “free tier eligible”. With your Neurohackweek credentials you will only be able to start AMIs with this label.
Amazon Linux is maintained and optimized for AWS for use on EC2. Let us begin by launching an Amazon Linux AMI. Choose “Select” at the right for this image in the top row. You will now be asked to choose an instance type.
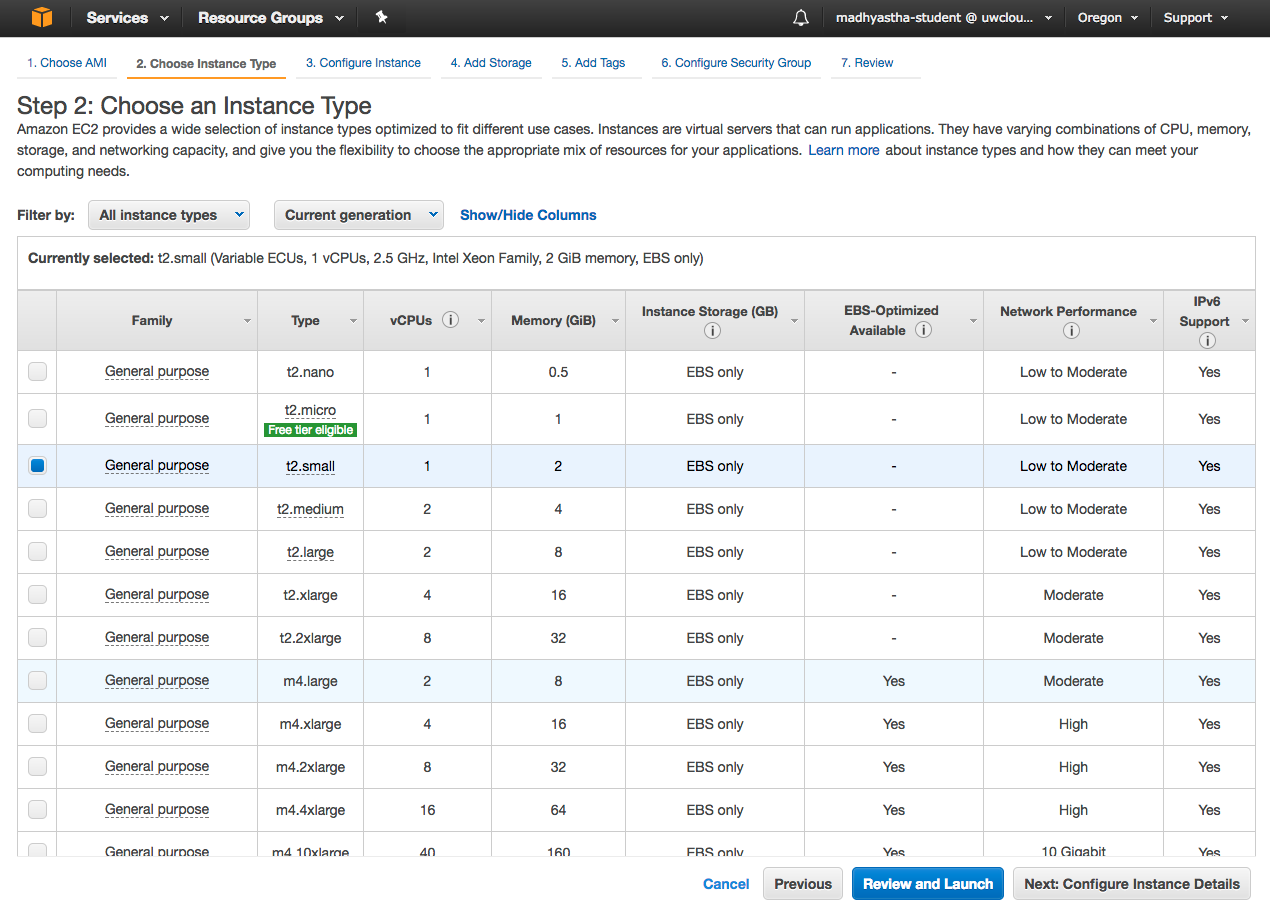
If you were launching a real machine, here you would make a decision about what resources you need to run your applications. AWS provides a list of instance types that describe the number of virtual CPUs, memory, storage and network performance that the instance will have when launched. We will talk more about how to make choices here in Neurohackweek, but for now you only have permission to launch the “t2.small” instance type in Oregon. So select the third row and select step 3, Configure instance.
If you want to know more
You can read more about instance types https://aws.amazon.com/ec2/instance-types/.
For neuroimaging processing, you probably will be best off with either the Compute Optimized or Memory Optimized types. Start with the Compute Optimized unless you know or learn that your application doesn’t fit into the memory available on those instance types. Otherwise, if you have a GPU accelerated application, you can look at the Accelerated Computing instances.
For the moment, you can leave all these settings alone and move on to step 4, “Add Storage”. AWS instances can have different types of storage (optimized for different purposes) and this storage can be different sizes. Disks are called “Volumes”.
-
For a simple machine configuration, your default volume type will be “Root”. This means that this volume will hold all the system software that you want to install, in addition to any data that you will be processing. You can leave this unchanged.
-
The next thing to note now is the size, which is in gigabytes. If you are processing a lot of data, or if your software install takes up a lot of space, you may need to specify a larger volume here. Alternatively, if you run out of space, you can resize the volume on the fly.
-
Note that the volume type, by default, is General Purpose SSD. Alternatively you can specify a type of volume, “Provisioned IOPs”, that can support many more I/O operations (e.g. reads, writes) per second. You probably don’t need anything too fast or fancy for neuroimaging applications that are good candidates for running in the cloud, so you can probably leave this as is.
-
This tiny, tiny check box is really important! Although with your neurohackweek account you don’t pay anything, if you were using your own account, you would pay separately for the storage (volumes) that you use and for the AMIs that you run. This checkbox means that this volume will be deleted when you terminate your AWS instance. You probably want this behavior, so that you are not charged for lingering root volumes for AWS instances whose lifetime is over.

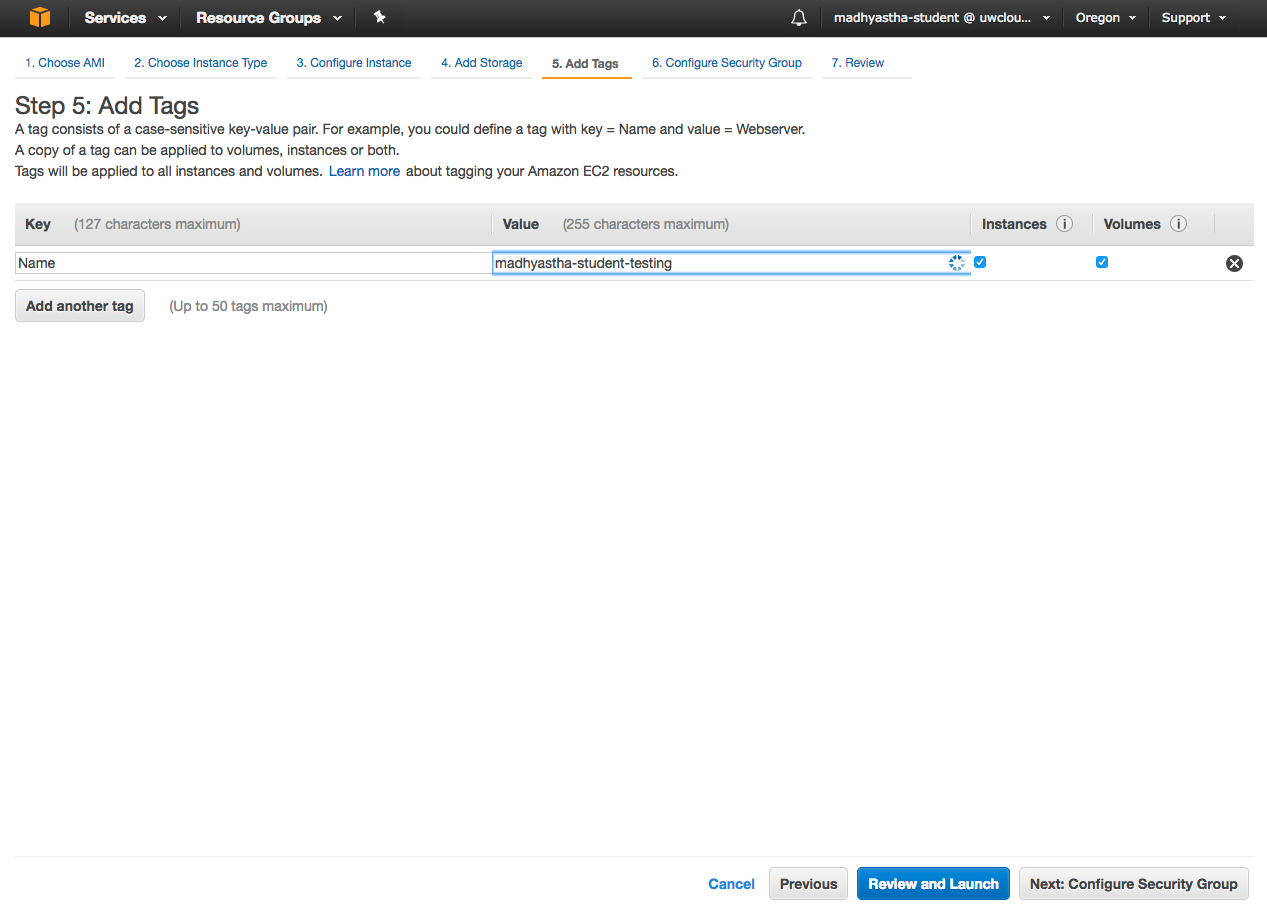
Now move on to step 5, “Add Tags”. Click on the “Add Tag” button. Here you can give your AMI a name to help you find it among all the other AMIs started by your classmates. I’ve done this here by typing “Name” in the key field and “madhyastha-student-testing” (not even using most of my 255 characters!) to associate that tag with my instances and volumes.
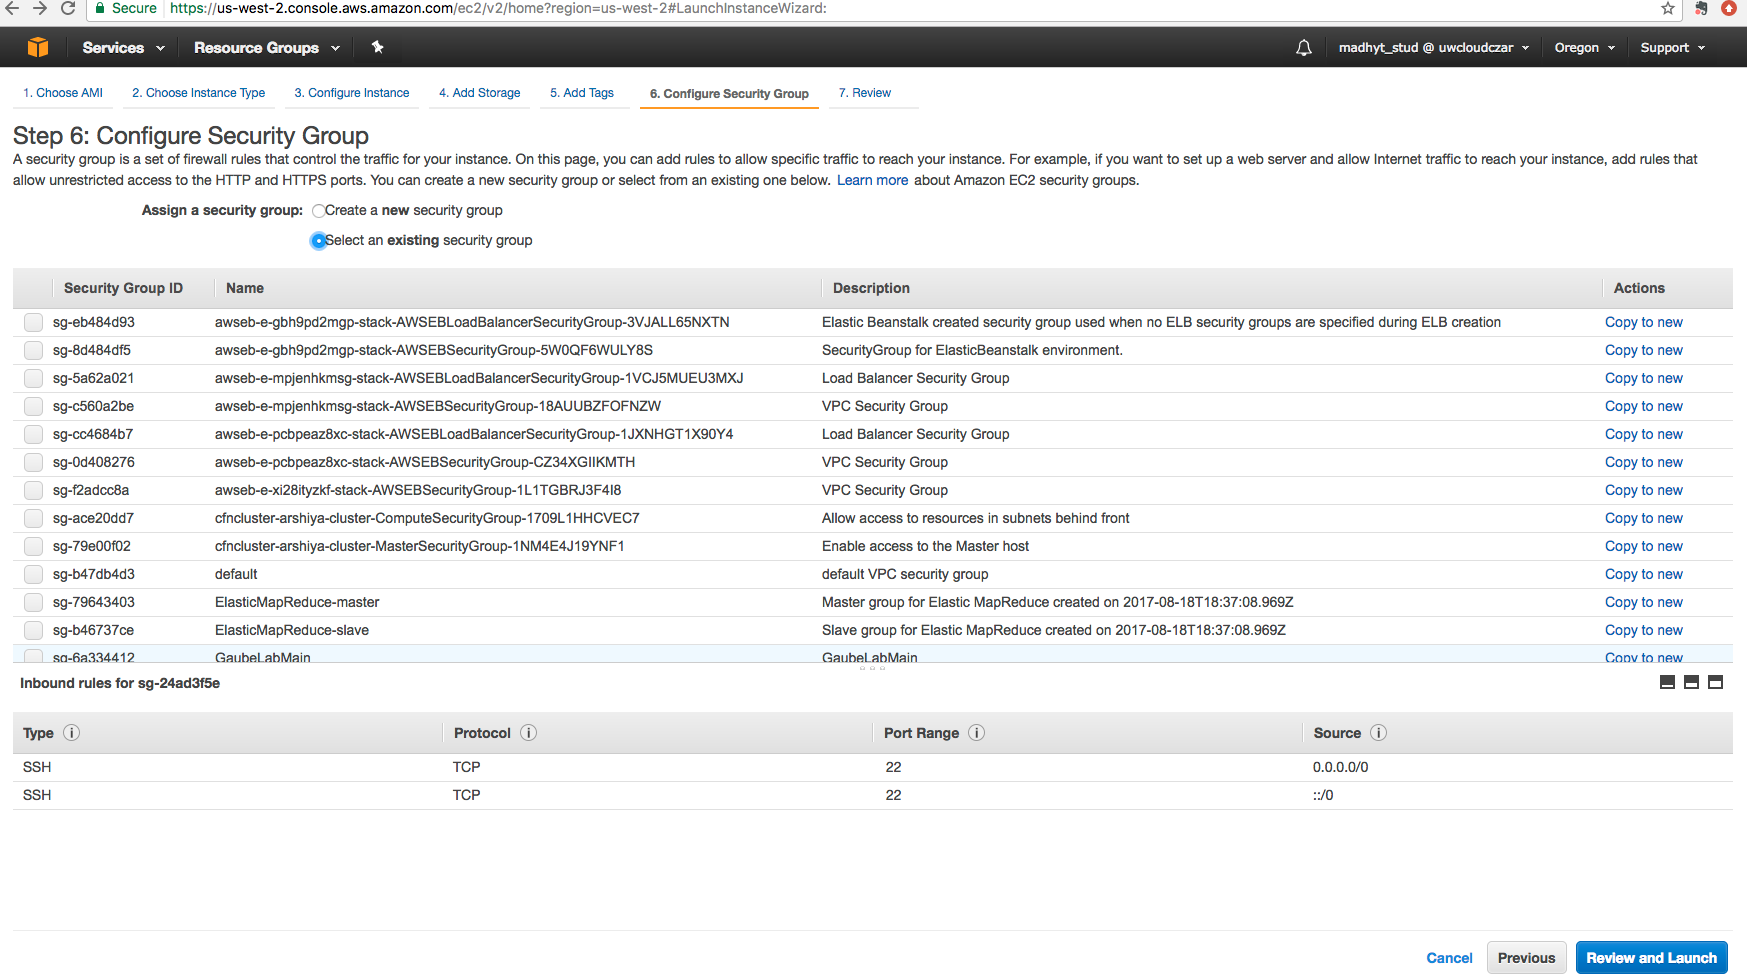
Step 6 is to “Configure Security Group”. A security group describes rules that control network traffic in and out of your instance. A specific security group, “neurohackweek”, has been set up for you. You should select this security group by choosing the radio button “Select an existing security group” and scrolling through the list of groups until you see the neurohackweek group.
Now you can click on “Review and Launch”. You will need to review your instance launch details, but you can move forward to Launch. Note that you will get a message saying that your instance configuration is not eligible for the free usage tier, but that’s ok, we set it up that way.
Here you will be asked for a key pair. Recall that a key pair allows you to access an EC2 instance. If you are following along this tutorial for the first time you will not have an existing key pair. You will need to choose “Create a new key pair”.
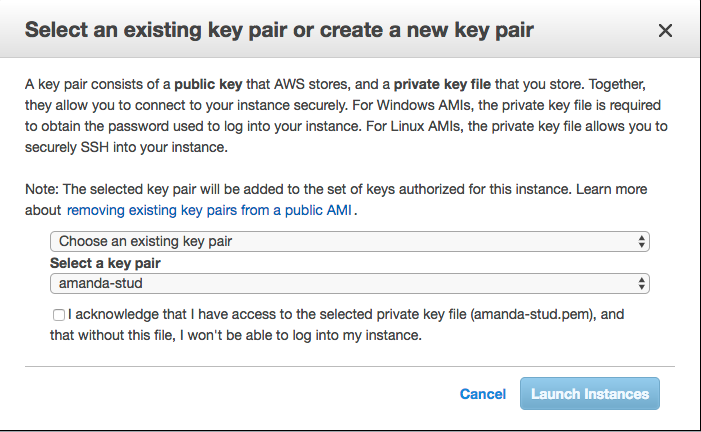
Note that when you do that, you see a little blue warning telling you that you need to download the private key file (*.pem) to a secure and accessible location. If you don’t do this, you won’t be able to log on to your instance.
Give your key pair a meaningful name and download it to somewhere you can find it on your computer.
You must also change permissions on the key pair to make sure that it
is not publicly viewable. Here, I have put my key in my directory ~/.ssh
chmod 400 ~/.ssh/tara-newkey.pem
If you want to know more
You can learn more about creating a key pair at http://docs.aws.amazon.com/AWSEC2/latest/UserGuide/ec2-key-pairs.html#having-ec2-create-your-key-pair
Logging in to your EC2 Instance
Once you have launched your instance, note the instance ID. This will help you to identify your instance in the future.
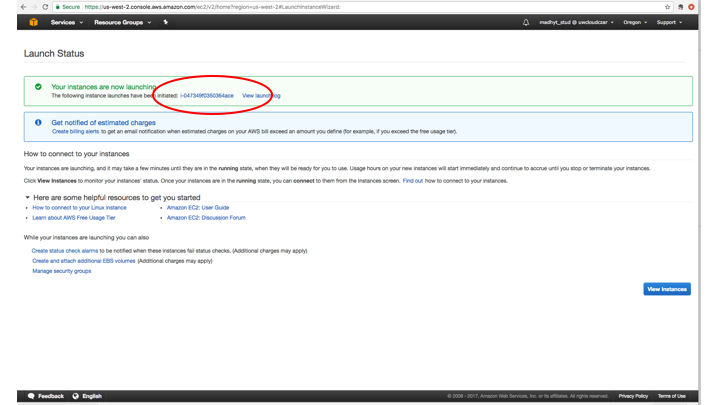
If you click on it, you will see some details about it, including a public IP address.
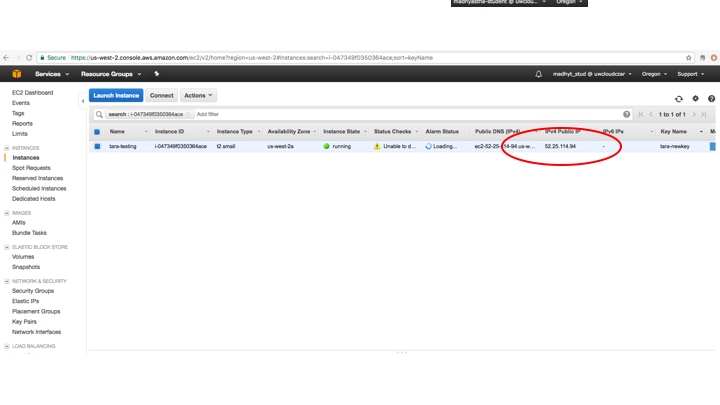
Now you can log in to your instance with the following command.
ssh -i ~/.ssh/tara-newkey.pem ec2-user@52.25.114.94
Note that the default user is ec2-user. This is because we started
an Amazon Linux instance. The default user name for an Ubuntu instance
is ubuntu or root.
If you want to know more
You can read more about logging on to your Linux instance http://docs.aws.amazon.com/AWSEC2/latest/UserGuide/AccessingInstancesLinux.html
Stopping and Terminating an EC2 Instance
When you are done with your EC2 instance, either for the day or for ever, you should shut it down to avoid being unnecessarily charged (although for this tutorial you will not be charged)!
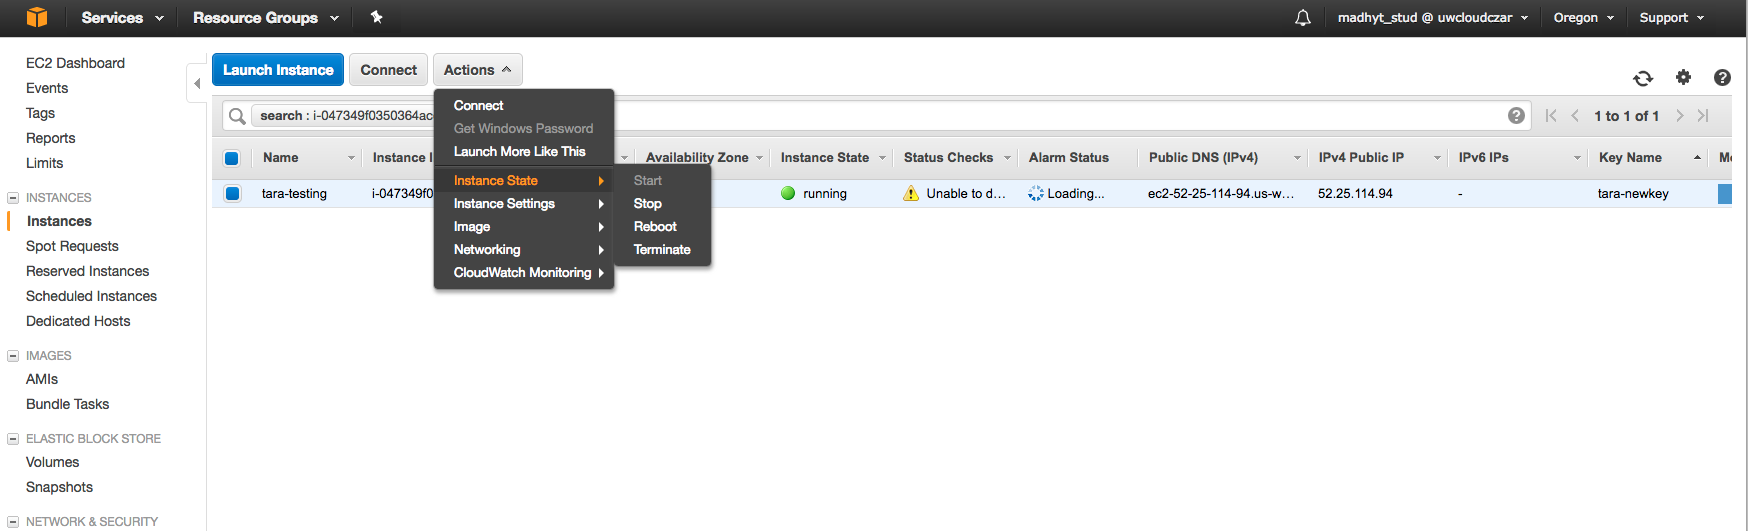
Stopping an instance stops it from incurring charges (except for any volumes that it uses). Terminating an instance removes it, and normally also removes its storage.
You can also reboot the instance, which is just like an operating system reboot. These options are visible in the Action menu, shown below.
Key Points
AWS EC2 instances with a wide range of software can be started on demand